Once the relevant person in your firm has assigned you some jobs, you will be able to access your jobs and begin working on them.
Click Jobs > Jobs. The page will open on the Open Jobs tab, click here to learn about the jobs tabs.
You can specify the number of jobs that are displayed on the page. In your user profile, on the Details tab, select your preferred default number of items on page.
Depending on your security role, you can use the Jobs page to access the following information:
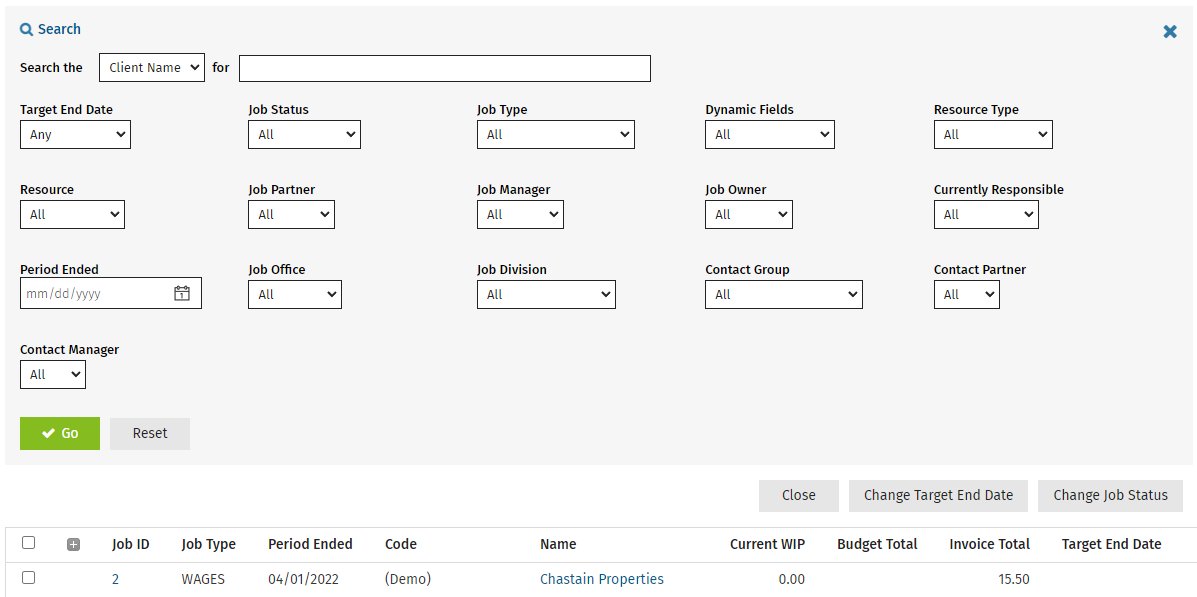
- Job ID - the unique number automatically generated when the job is created.
- Job Type - the type of job (e.g. GEN).
- Period Ended - the period end date for the job (if applicable).
- Name - the client name.
- WIP, budget and invoice view (default) - allows you to focus on the dollar amounts associated with jobs:
- Current WIP - the current amount of WIP on the job.
- Budget Total - the total amount budgeted for the job and what percentage of this has been used so far.
- Invoice Total - the total amount of finalized invoices for the job.
- Target End Date - the target end date set for a job (if this has been specified). Practice Manager shows the number of days under or over the specified completion date.
- Hours view (you must enable this view) - allows you to focus on the time left to complete jobs rather than dollar amounts:
- Hours Worked
- Hours Allocated
- Hours to Go
- Target End Date
- Date Changed - the date of the last job status change.
- Job Status - the current job status.

To conduct a quick search, select a search filter from the list, then type the first few letters of the required information in the search box and press Enter. The default search will either be Client Name or Client Code but this is determined by the Contacts Sort Order & Navigation setting in your user account. You edit this setting, along with the number of items you want to appear in the list, in your user account.

For a more advanced search, click the Search button  to open the expanded search options. Use the required filters, then click Search. You can then click the column headers to sort the information listed beneath them.

When you collapse the search area, you will see details of your current search criteria. To reset the search, open the search area and click Clear followed by Search.

Click the expand buttons to see whether a job was created automatically, and view any details recorded about it, for example, information to help you complete the job. Click on the job to access the Job Details page. You can enable the hours view on the jobs grids if you want to view time information about jobs instead of the default WIP, budget and invoicing information.

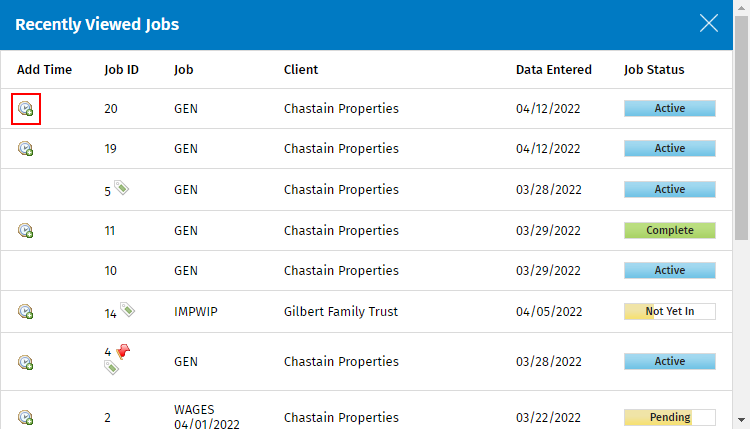
To quickly locate jobs you have recently accessed, click your user name in the top menu; then click Recently viewed job. Click the row of a job to open its Job Details page. The recently viewed jobs is also a dashboard item, that you can use to link to a job.

Click your user name in the top menu; then click My Profile, select the required number from the Default number of items of Page, and click .